Category: Home Organization

Simple systems for closets, kitchens, entryways, and everyday clutter.

  • How to Organize Under the Sink Around Pipes and Cleaning Supplies

    How to Organize Under the Sink Around Pipes and Cleaning Supplies

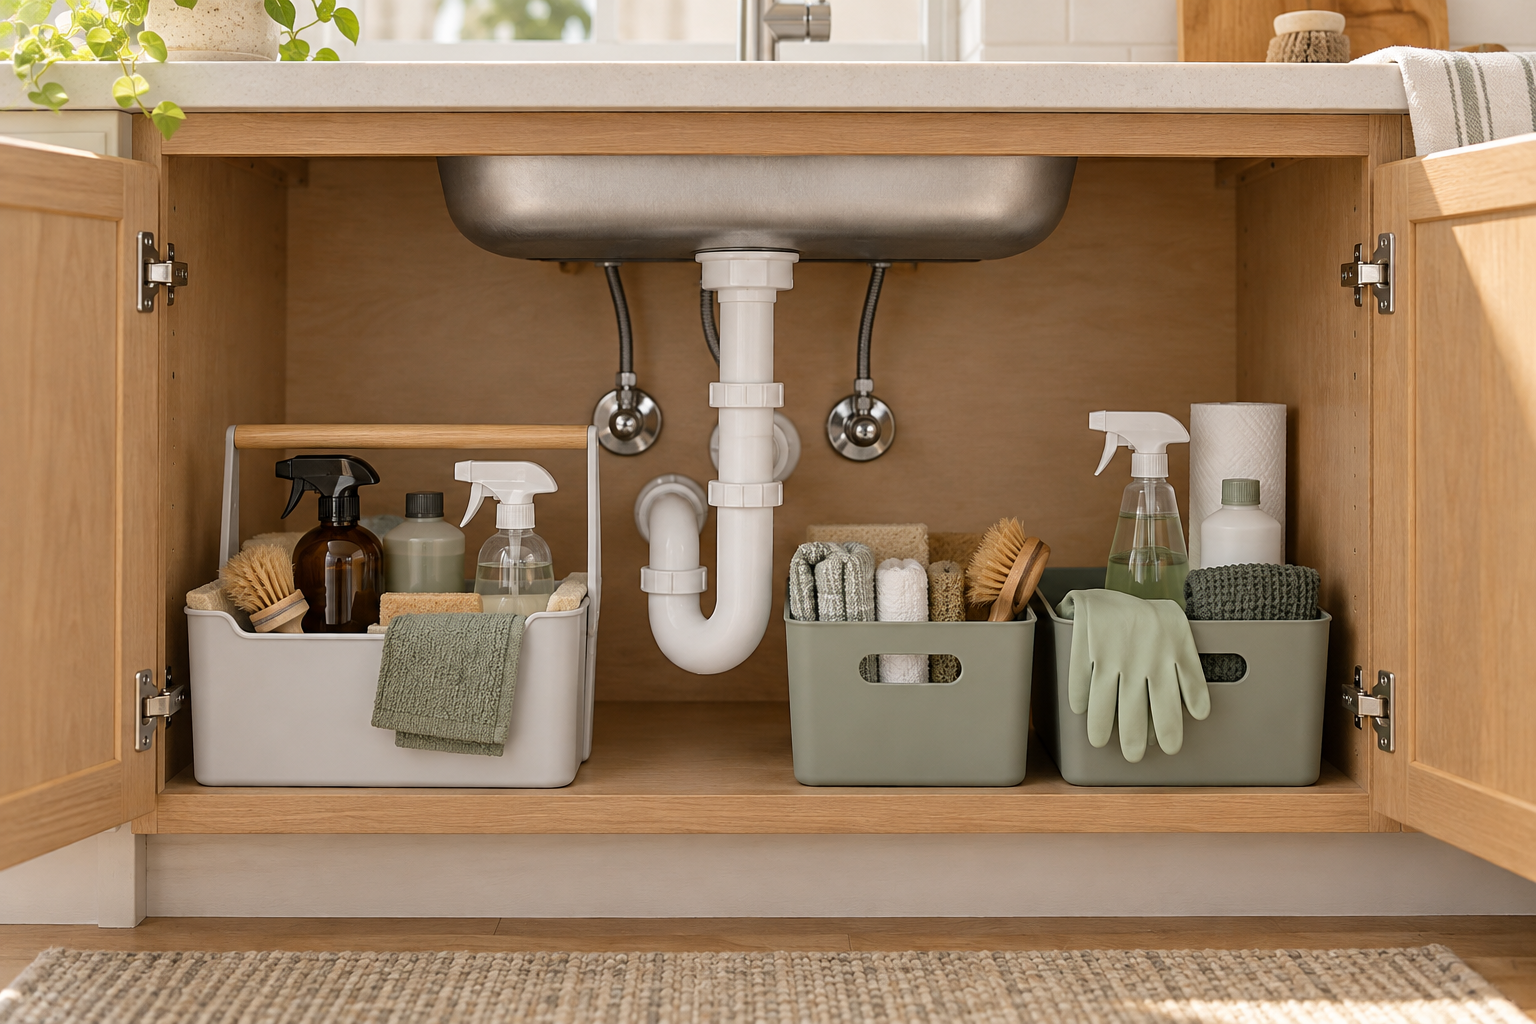
    Under-sink storage is difficult for a simple reason: it is not an empty box. Pipes, shutoff valves, hinges, and the sink basin interrupt the space, while cleaning supplies come in awkward shapes and heights. The best system works around those fixed elements instead of trying to hide them.

    This guide shows you how to organize under the sink safely, keep plumbing accessible, and create a layout that is easy to maintain—even in a very small cabinet.

    The short answer

    Empty the cabinet, check for leaks, measure around the plumbing, group supplies by use, and test a removable layout before buying organizers. Keep valves visible, heavy bottles low, and products in their original labeled containers.

    1. Empty the cabinet and check for moisture

    Take out every movable item. Wipe the cabinet base and inspect the back corners, pipe connections, and area around the drain. Look for dampness, staining, swelling, peeling finishes, or an unusual odor. If you find an active leak, address the plumbing problem before putting anything back.

    Do not cover signs of moisture with a liner and assume the problem is solved. A removable tray can help contain minor drips from bottles, but it is not a repair. Keep shutoff valves and pipe connections visible enough to inspect.

    2. Make a simple plumbing map

    Measure the cabinet opening first, then the usable interior. The two measurements are often different because doors, hinges, and the cabinet frame reduce access. Record the height beneath the sink basin and the clearance on each side of the drainpipe.

    • Measure the width and depth of each usable zone.
    • Note where pipes enter the wall or floor.
    • Leave room for your hand to reach each shutoff valve.
    • Check whether a proposed drawer or bin can pass through the door opening.
    • Allow space to lift tall bottles out without hitting the sink.

    A quick photo of the empty cabinet can help while shopping, but write down the measurements too. Visual estimates are unreliable in a space with so many obstructions.

    3. Decide what should actually live under the sink

    Put similar items together on the floor or counter: everyday cleaners, dishwashing supplies, cloths and brushes, refills, and occasional-use products. Remove empty containers, worn tools, and products you no longer use. Follow local guidance and the product label when disposing of unwanted household chemicals.

    Keep cleaning products in their original labeled containers. Never combine products or transfer them into food and drink containers. Avoid storing food beside household chemicals. If children or pets can access the cabinet, follow each product’s storage instructions and use appropriate secure storage; an open basket is an organizer, not a safety lock.

    4. Create zones around the pipes

    Instead of forcing one large organizer into the cabinet, divide the irregular space into smaller zones. A practical layout often includes:

    • A grab-and-go caddy for the products you use most often.
    • A low bin for sponges, cloths, gloves, or compact tools.
    • A stable bottle zone for heavier containers that should remain upright.
    • An open maintenance zone around valves, the trap, and pipe connections.

    Place the most frequently used items near the front. Store heavier bottles low and on a stable surface. Do not hang weight from plumbing, and avoid stacking supplies so tightly that you must dismantle the cabinet to check a pipe.

    5. Test the layout before buying organizers

    Use containers you already own to test the zones for a few days. A shoebox-sized bin, shallow tray, or sturdy caddy can reveal whether the layout is convenient before you spend money on a fitted system.

    During the test, notice what slows you down. Do bottles tip when the caddy moves? Is one bin too deep to see inside? Does a handle collide with a pipe? The answers tell you what the final organizer must solve.

    6. Choose organizers that fit the real space

    If you decide to buy storage, compare the product’s usable dimensions with your measurements—not just the cabinet’s overall size. Check handles, drawer travel, shelf height, assembly requirements, and any stated load limit.

    When a caddy works best

    A handled caddy is useful when supplies need to travel from room to room or when plumbing access requires everything to be removed quickly. Choose one that is stable when lifted and easy to wipe clean.

    When low open bins work best

    Low bins make small items visible and can fit beside pipes or beneath a low sink basin. Avoid containers so deep that small tools disappear at the bottom.

    When a pull-out unit may help

    A pull-out organizer can improve access to the back of a deep cabinet, but it needs enough clearance to open fully. Confirm that the frame, upper tier, and stored bottles will not collide with pipes, hinges, or the door.

    7. Use the cabinet doors carefully

    The inside of a door can hold a lightweight cloth or a small, properly secured organizer if the door, hinges, and cabinet design allow it. Before adding anything, check that it clears the shelves and plumbing when the door closes. Avoid overloading the hinges or placing tall items where they can fall.

    8. Keep the system easy to reset

    A good under-sink system should be understandable at a glance. Give each category one home and avoid filling every inch. Once a week, return stray items to their zones. Once a month, remove the bins, wipe the base, and inspect the plumbing for moisture or deterioration.

    If clutter returns quickly, the answer is usually fewer stored items or simpler categories—not another layer of containers. Move suitable duplicates or occasional-use items elsewhere rather than making the cabinet harder to inspect.

    A practical under-sink checklist

    • Resolve leaks before organizing.
    • Measure the opening, hinges, pipes, and vertical clearance.
    • Keep valves and plumbing connections accessible.
    • Keep products in their original labeled containers.
    • Store heavy bottles low and upright.
    • Use secure storage where children or pets may have access.
    • Test a removable layout before buying hardware.
    • Leave enough open space for regular inspections.

    Frequently asked questions

    Should I use shelf liner under the sink?

    A removable, wipeable liner or tray can make cleanup easier, but it should not conceal moisture or prevent you from checking the cabinet base. Lift it regularly and inspect underneath.

    How do I organize around a garbage disposal?

    Treat the disposal and its connections as part of the maintenance zone. Do not block access or place storage where it could interfere with the unit, wiring, or plumbing. Follow the manufacturer’s instructions for clearance and service.

    What should not be stored under the sink?

    Avoid food, items that can be damaged by moisture, and anything that conflicts with the storage directions on a product label. Household chemicals that require secure or temperature-controlled storage belong in a more suitable location.

    Start with access, not accessories

    The most useful under-sink cabinet is not the one with the most bins. It is the one where you can reach everyday supplies, inspect the plumbing, and reset the space in minutes. Clear the cabinet, map the obstacles, test a simple layout, and buy only what solves a specific problem.

    Continue with our guides to organizing a small kitchen before buying more storage, organizing a small closet without a full makeover, and creating a practical entryway when there is no room for a console table.
  • How to Organize a Small Closet Without a Full Makeover

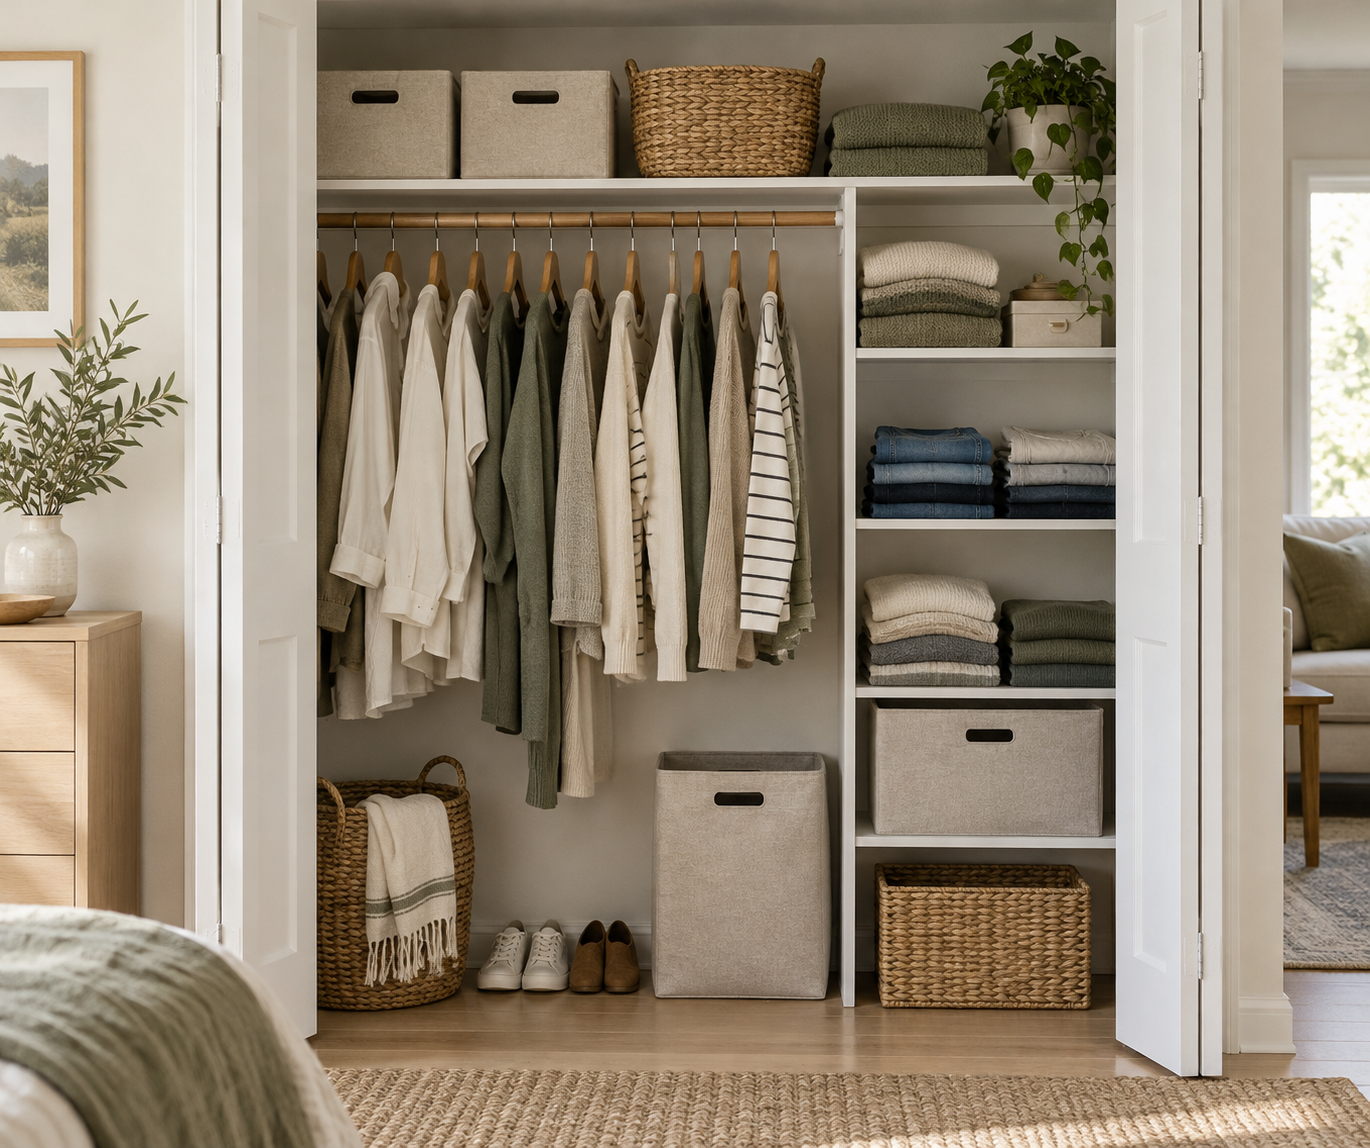
    Illustrative compact home interior
    AI-generated interior illustration.

    Make everyday clothes easier to find with a simple closet reset. Start with your current shelves and hangers, then decide whether you actually need more storage.

    1. Start with one manageable section

    A crowded closet can be difficult to use even when every item technically fits. Choose one rail, shelf, or drawer and finish it before moving to the next. Put aside a bag for items you decide to donate and a separate spot for things that belong elsewhere. Check with other household members before moving their belongings.

    Keep the floor and the exit clear while you work. You do not need to turn the whole room into a sorting area. If time is limited, start with the clothes you reach for on a normal weekday.

    2. Sort around the life you actually live

    Group clothes by type, then ask which pieces fit, feel comfortable, and suit your current routine. Separate items needing repair so they do not disappear back into the wardrobe. Make a specific plan for each repair rather than keeping an indefinite pile.

    An occasional-use outfit can still deserve a place. The aim is to make everyday choices easier, not to meet an arbitrary item count. Put seasonal clothing together only if you have a suitable clean, dry place to keep it.

    3. Give prime space to frequent use

    Place frequently worn clothes where you can comfortably see and retrieve them. Fold items that work well on your shelves, and hang pieces that benefit from hanging. Avoid tall, unstable piles: several smaller groups may be easier to maintain.

    Keep heavy items low and do not overload shelves or rods. Follow the closet hardware specifications. Store shoes where they will not block access, and give bags a defined section rather than scattering them across the floor.

    4. Use the containers you already have

    A clean box can separate scarves or other small accessories. Try a simple arrangement for a week before buying coordinated baskets. Labels are helpful if they prevent guessing, especially for shared storage.

    Measure usable shelf width, depth, and height before ordering containers. Allow clearance for doors and handles, and check whether you can pull the container out without moving several others. Matching boxes are optional; easy retrieval matters more.

    5. Make putting clothes away easy

    Notice the step that causes a pile to form. Perhaps a hamper is inconvenient, a shelf is too high, or hangers are packed too closely. Change that step instead of adding a more complicated system.

    Keep a small return routine: hang or fold clean clothes, send laundry to the hamper, and return accessories to their section. Revisit the setup after a normal week and adjust anything that takes too much effort.

    Your practical checklist

    • Sort one section at a time.
    • Keep everyday items accessible.
    • Separate repairs and misplaced belongings.
    • Use stable stacks and respect hardware limits.
    • Measure before purchasing storage.
    • Test the system through a normal week.

    Explore more practical home guides →

  • How to Organize a Small Kitchen Before Buying More Storage

    A small kitchen does not always need more storage. Sometimes it needs fewer items competing for the same shelf. This practical reset starts with what you already own and helps you decide whether an organizer would actually solve a problem.

    Your goal: give frequently used items an easy-to-reach home, keep a usable preparation area, and make cleanup straightforward. Work on one drawer or cabinet at a time so the kitchen stays usable.

    1. Choose one frustrating spot

    Start where clutter repeatedly gets in your way: a crowded utensil drawer, mismatched food containers, or the counter beside the stove. Avoid emptying the whole kitchen at once. Pick a section you can finish in one session.

    Set out three temporary sorting areas: keep here, move elsewhere, and let go. A cardboard box or a cleared section of table is enough.

    2. Sort by use, not by appearance

    Ask whether you use each item, whether it works, and whether you already own something that does the same job. Keep the tools that support the meals you actually prepare. A baking enthusiast and someone who mostly cooks quick dinners need different kitchens.

    • Daily use: place within easy reach.
    • Occasional use: use a less convenient shelf if it can be accessed safely.
    • Rarely used: consider another storage location or passing it on.
    • Broken or incomplete: decide whether it is worth repairing or replacing.

    Do not discard shared belongings without checking with the people who use them. Keep accessibility needs in mind when assigning shelves.

    3. Match every container with its lid

    Lay out food-storage containers and lids together. Separate damaged pieces and unmatched lids. Nest compatible empty containers if that makes them easier to retrieve; keep lids upright in a box you already own, or store each lid with its container when space allows.

    A system is useful only if everyone can put items back without rearranging the entire shelf. Try your arrangement before buying dividers.

    4. Create small working zones

    Group items around the tasks they support. Put mugs near your coffee or tea setup, preparation tools near the available work surface, and dishwashing supplies near the sink. The exact layout should follow your kitchen and your habits.

    Leave room to open doors and drawers. Keep heavy items in stable, accessible positions rather than precariously stacked overhead. Follow appliance instructions for ventilation and clearance.

    5. Clear one preparation area

    Choose a section of counter for chopping and assembling meals. Move items that do not need to live there. Keep out an appliance if you use it regularly and have a suitable location; store occasional-use appliances only where you can lift and retrieve them safely.

    A clear counter is a working surface, not a rule that every kitchen must look empty. Keep the items that make your routine easier.

    6. Measure before adding storage

    After reorganizing, note the remaining problem. Do you need to separate utensils, reach the back of a cabinet, or prevent a stack from falling? Then measure the space: usable width, depth, height, door opening, and any hinges or pipes.

    Check whether a proposed organizer reduces usable space or makes items harder to reach. Under-sink storage needs room around plumbing and access for maintenance. Avoid placing food with household chemicals; follow product labels for storage.

    7. Test the setup for a week

    Use the kitchen normally and watch where clutter returns. If a tool is always left on the counter, its assigned location may be inconvenient. If containers are difficult to put away, simplify the arrangement. Adjust one problem at a time.

    A short evening reset can help: return misplaced items, deal with dishes, and leave your preparation area ready for the next meal. Choose a routine that fits your household.

    Your small-kitchen checklist

    • One troublesome drawer or cabinet sorted.
    • Frequently used tools easy to retrieve.
    • Containers and lids matched.
    • One usable preparation surface.
    • Heavy items stored securely.
    • Any remaining storage gap measured.
    • One week of everyday use before buying an organizer.

    Start today: choose the drawer that slows you down most. A useful improvement in one small area is a better starting point than an unfinished overhaul.